Free and open source Image Optimization & Transformation API build on Typescript using Sharp and Serverless. Ready to be deployed on AWS Lambda and Cloudfront.
First copy and rename the .env.example file.
cp .env.example .env
Then change the values to your needs. Use the following table to understand what each variable does.
| Variable | Accepted values | Comments |
|---|---|---|
| ENVIRONMENT | production / development | |
| API_ENDPOINT | /api/v1/image | the path to access the api |
| PORT | 3000 | The port you want it to run locally. |
| LOSELESS | false | Use looseless compression |
| QUALITY | 90 | Suggested between 70 and 90 depending on the use case |
| LOG_LEVEL | error warn / info / http / verbose / debug / silly | |
| ORIGIN_WHITELIST | ['yourorigin.com'] | remove env to allow all origins |
| REDIRECT_ON_ERROR | false | Will redirect to original image on error |
| WEBP | true/false | Enables webp format if accept header includes image/webp |
| AVIF | true/false | Enables avif format if accept header includes image/avif |
| AVIF_MAX_MP | Number | Maximum megapixels for avif format on output. |
npm install
serverless offline
By default the API will run on port 3000. You can change it on the .env file by setting the PORT variable.
You can try it by accessing the following url on your browser:
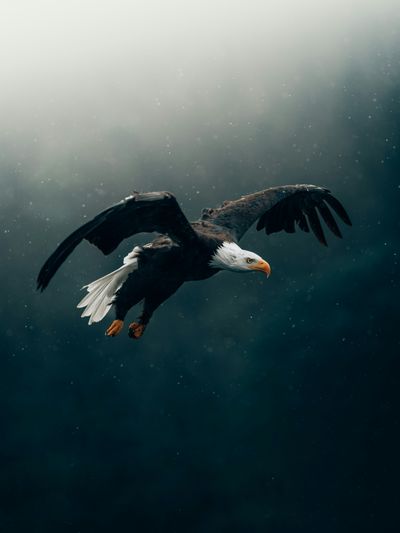
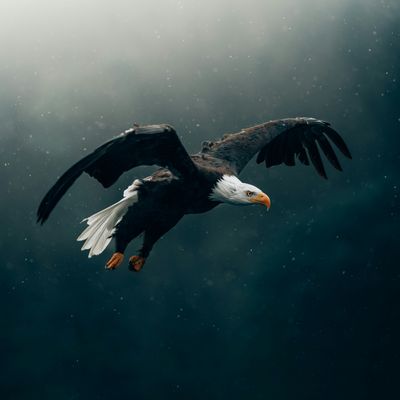
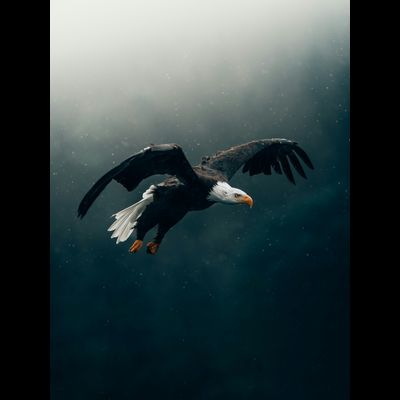
http://localhost:3000/dev/api/v1/image?url=https%3A%2F%2Feagle-image-test.s3.us-west-1.amazonaws.com%2Fpublic%2Feagle-2.jpg
The url query param is required and should be a valid url encoded string. In this case for testing purposes we are using an image hosted on S3. The original image URL is:
https://eagle-image-test.s3.us-west-1.amazonaws.com/public/eagle-2.jpg

Photo by Philipp Pilz on Unsplash
npm install
serverless deploy --stage {your_stage}
To run and test the API you can use the following Postman collection

The API uses query params to transform the images. The following table shows the available options. More information on how the transformations work can be found on Sharp's Documentation.
| Query param | Description | Values |
|---|---|---|
| src | Url that points to the original location of the image in the form of a url encoded string | String |
| width | Width | Number |
| height | Height | Number |
| fit | When both a width and height are provided, the possible methods by which the image should fit these are: | cover / contain / fill / inside / outside |
| position | When using a fit of cover or contain, the default position is centre. Other options are: | top, right top, right, right bottom, bottom, left bottom, left, left top |
| quality | Quality | Number (0-100) |
| lossless | use lossless compression mode | Boolean |
| effort | CPU effort, between 0 (fastest) and 6 (slowest) | Number (0-6) |
| alphaQuality | quality of alpha layer, integer 0-100 | Number (0-100) |
| loop | GIF number of animation iterations, use 0 for infinite animation | Number |
| delay | GIF delay(s) between animation frames (in milliseconds) | Number |
You can use the following examples to understand how to use it. Remember to replace the API_ENDPOINT with the one you set on your .env file.
{{API_ENDPOINT}}/api/v1/image?width=400&height=400&url={{IMAGE_URL}}

View original api response here
{{API_ENDPOINT}}/api/v1/image?width=400&height=400&fit=cover&url={{IMAGE_URL}}
View original api response here
This will deform the image to fit the size
{{API_ENDPOINT}}/api/v1/image?width=400&height=400&fit=contain&url={{IMAGE_URL}}
View original api response here
{{API_ENDPOINT}}/api/v1/image?width=400&height=400&fit=cover&position=top&url={{IMAGE_URL}}

View original api response here
For the purpose of this test we set quality=10 just to test it, normally you should use quality between 70-90
{{API_ENDPOINT}}/api/v1/image?width=400&height=400&fit=cover&position=top&quality=10&url={{IMAGE_URL}}

View original api response here
{{API_ENDPOINT}}/api/v1/image?quality=80&lossless=true&url={{IMAGE_URL}}